Crews can be set up as a Large Crew, Small Crew, Crackseal Crew, etc., or you can choose to set up an individual Role as a 'crew,' such as Roller Man or Operator.
TABLE OF CONTENTS
View our Crews video on YouTube

Other helpful videos associated with Crews:
- Inputting Costs (beginning at 14:30)
Bitumio > Left Navigation Bar > Product Settings > CrewAccessing Crews
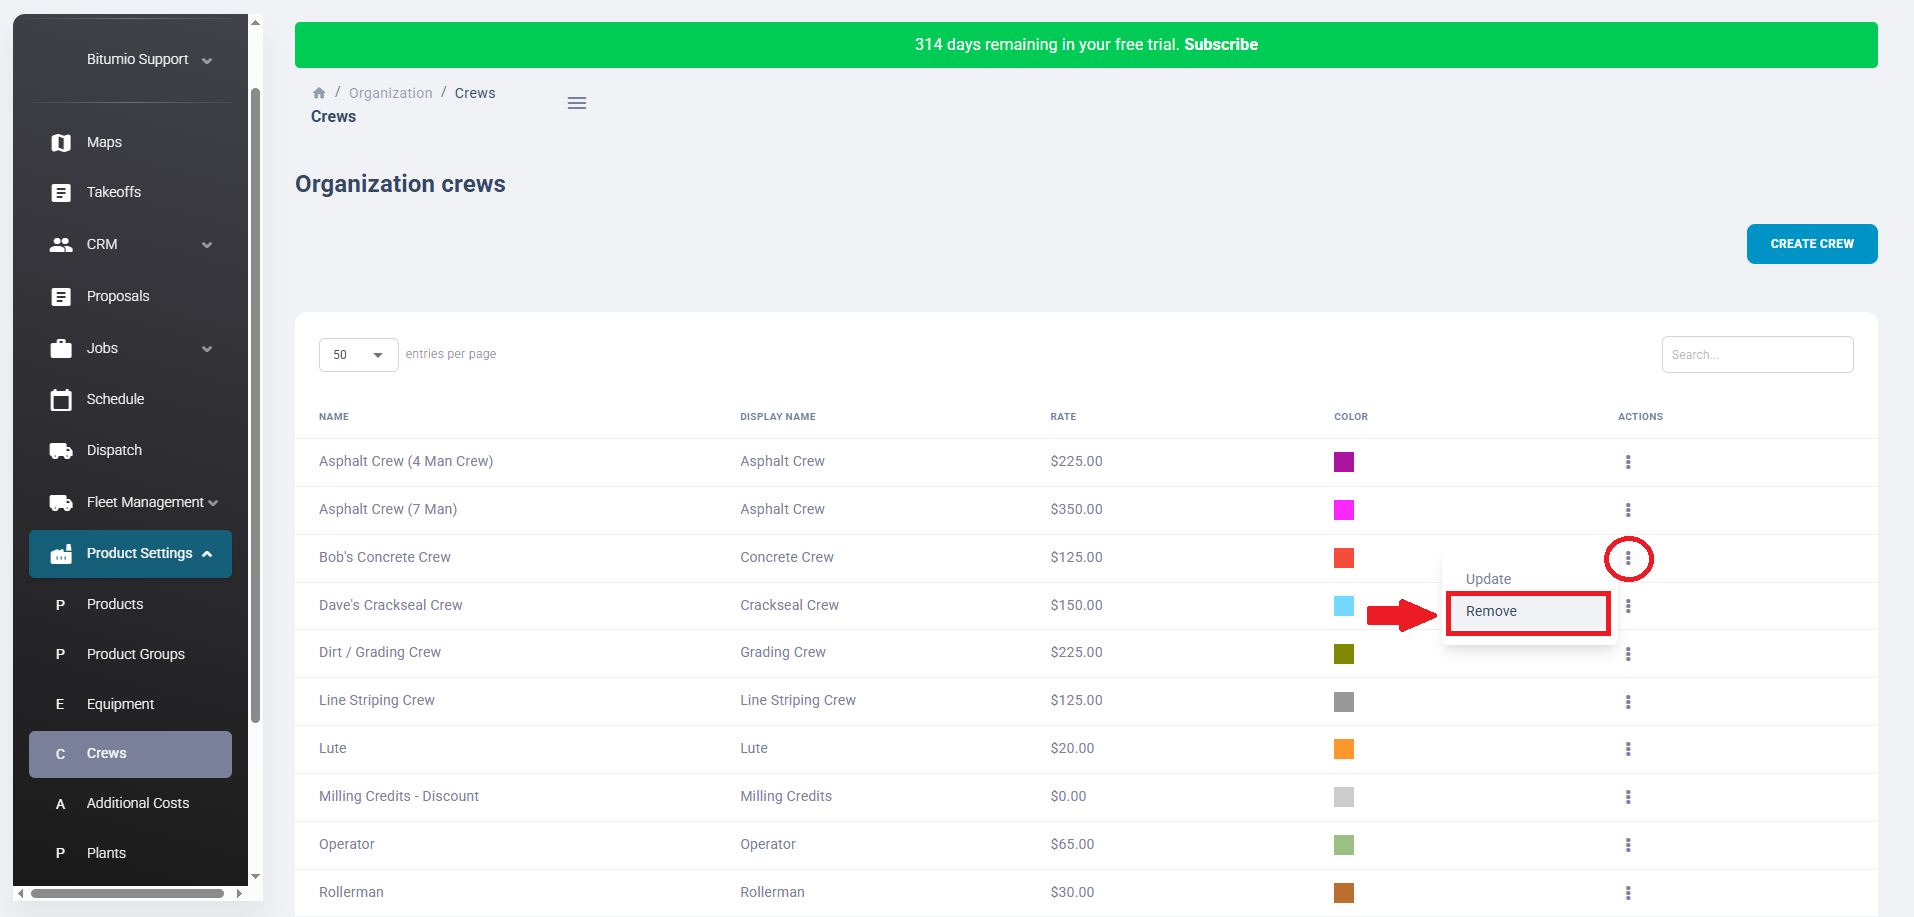
Within the Organization Crews screen, all existing Crews are displayed. Information for each crew is tabulated via various columns that include Name, Display Name, Rate, Color, and Actions.
You can search for a specific Crew using the search bar at the top right corner of the grid.

By default, 10 records are displayed per page. However, you can change it to 25, 50, or 100 using the dropdown on the top-left corner.

Creating a Crew
Step 1: Click the  button. This takes you to the Create Crew screen.

Step 2: Use the Internal Crew Name field to record the internal name for the Crew you are creating. Eg. "5 man Sealcoat Crew.'

Step 3: Enter the client-facing name for the Crew using the Client Facing Crew Name field. This is the name that will appear on proposals.

Step 4: Select the default foreman using the Default Foreman dropdown. The foreman will be notified of Jobs updates, etc. and can be changed at the Proposal/Job level.

Step 5: Set the hourly rate for the Crew using the Rate field. A crew consisting of multiple members would be multiplied by each employee's hourly rate.
- Eg. If your 'small slurry crew' has 4 crew members earning $25 per hour. your total Crew Rate is $100 an hour (4 x $25 = $100)

Step 6: Choose the color to represent the crew using the Color Selector. This will be used on the Scheduling Calendar to differentiate between Crews.

Step 7: Once the required information is filled in, click the  button.
Updating a Crew
Step 1: Clicking a Crew name takes you to the Update Crew screen where you can edit the selected Crew details. Alternatively, you can click the  icon under the Actions column and choose 'Update.'

Step 2: Either option will navigate to the Update Crew screen. Once the required details are changed, click the  button.
Deleting a Crew
Step 1: Click the  icon under the Actions column for the crew you want to remove. From the options displayed, choose 'Remove.'
Step 2: This displays a confirmation popup asking you to confirm that you want to delete the selected crew. To confirm, click the  button.

Was this article helpful?
That’s Great!
Thank you for your feedback
Sorry! We couldn't be helpful
Thank you for your feedback
Feedback sent
We appreciate your effort and will try to fix the article